For a while now, I’ve been meaning to document my development configuration for a clean ARM CMSIS development environment. To be honest, the post acts more of a logbook for my work and for that reason i will only maintain this post as when new technology changes my workflow.
I feel that I should first start by pointing out that you can download various pieces of software that makes this process easier. However, knowing how to configure your own development environment will help in situation where you are developing at the edge of technology, as I quite often do. Look at it this way, if you are using the latest micro-controller that is only a few weeks old, chances are that the OpenOCD that you are using for programming and debugging wont have support for that micro. However, if you know how OpenOCD device profiles are created and used, then you can simply roll your own.
My objective for this post is to document the process of how I go about configuring a development environment for the ARM cores. I’m going to be using the NUCLEO-F030R8 Board by STMicroelectronics and I’m going to be doing the whole configuration on a linux (ubuntu) OS.
Because ARM is trying so hard to make it easier for us developers to migrate project code between vendor microcontrollers, If I can help it, I will be avoiding the use of vendor specific library and tools. if I have to, I will make sure that I make it clear why and comment on what you will need to look out for if you are using a different vendor MCU.
As final note, I wanted to say that it always bothers me when you find a tutorial online that goes through the step of doing something and the person doesn’t bother to briefly mention that a particular steps was done in such way because of personal preference. So in this post I will try my best to leave a comment where possible to highlight what was as a personal preference so that you have the choice to do it the way you want to do it. That said, if doing this sort of configuration is new to you, then I highly recommend that you stick to my method and attempt it your way once you are happy with the process.
Important Links
ARM CMSIS-Pack documentation
ARM CMSIS (Cortex Microcontroller software interface standard)
Downloads
before we begin, we should start by downloading all the files that you need.
- Eclipse IDE for C/C++ (link)
- using this link download the CMSIS, STM32F0 series devices and Nucleo board support and examples pack
- Using this link download the STM32Cube files for your selected microcontroller. In this case, Download the STM32CubeF0. We will need the linker file.
Process
install cross compiler
- Install ARM GCC compiler by running the following command in Ubuntu. [sudo apt-get install gcc-arm-none-eabi]
- Install openOCD [sudo apt-get install openocd]
Installing OpenOCD
mkdir -p ~/sandbox cd ~/sandbox mkdir openocd git clone git://repo.or.cz/openocd.git cd openocd sudo apt-get install make libtool pkg-config autoconf automake texinfo ./bootstrap ./configure make sudo make install
Install Eclipse
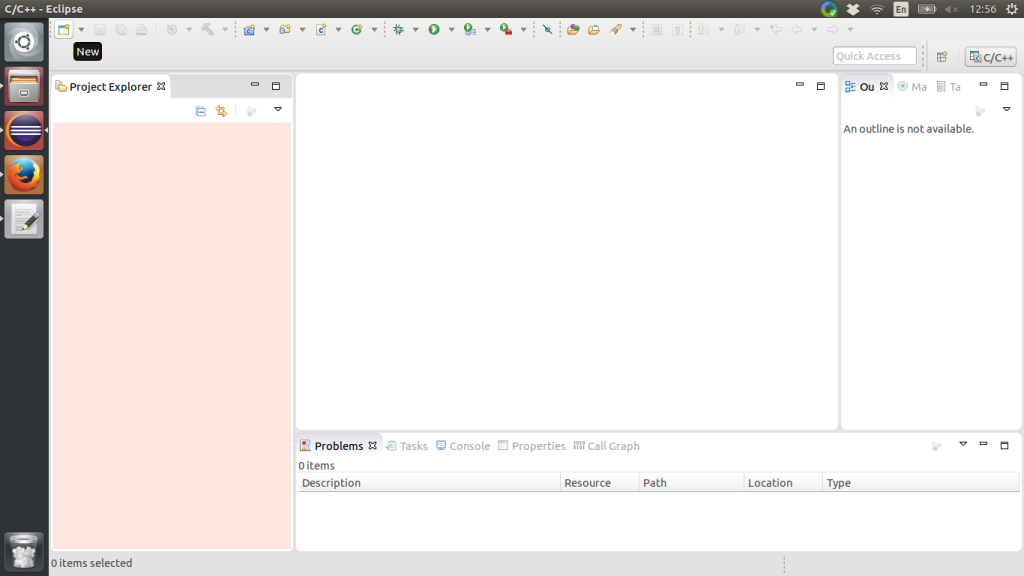
To start with, Download and install Eclipse IDE. Make sure that its the C/C++ variant. Once installed, go ahead open eclipse. The first time you open eclipse it will ask where to put your workspace. For the purpose of this post, create a folder in your desktop called “Sandbox“. This will serve as a place for us to test out our new environment. Ok, now that eclipse has loaded, close off the welcome page if its shows up. Then on the title menu, click on the “Help” followed by clicking on “Install New software” 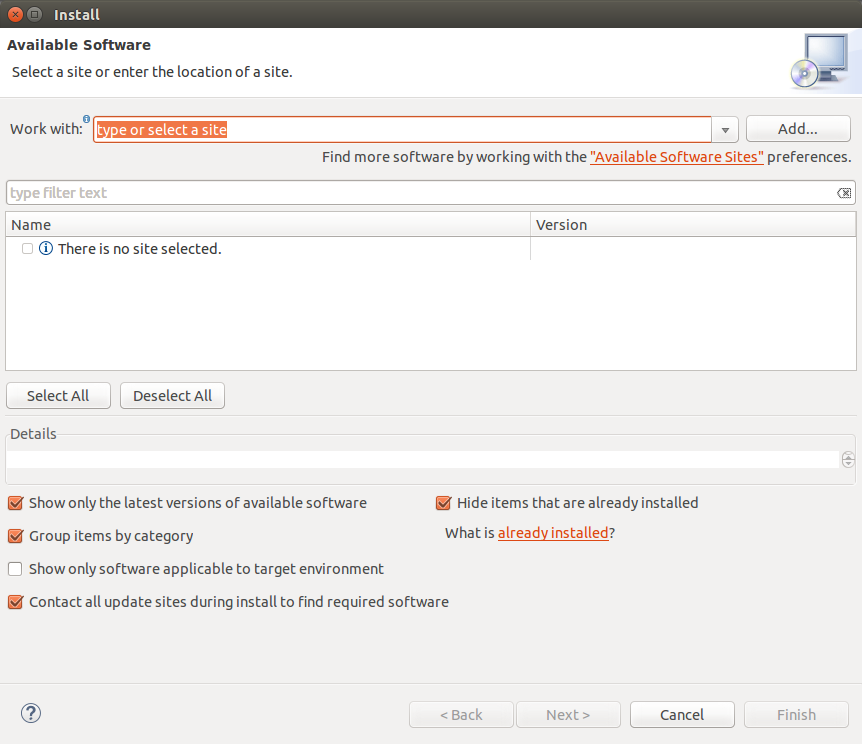 In “Work with:” type the following GNU ARM Eclipse Plug-ins – https://gnuarmeclipse.sourceforge.net/updates and then press add and then OK
 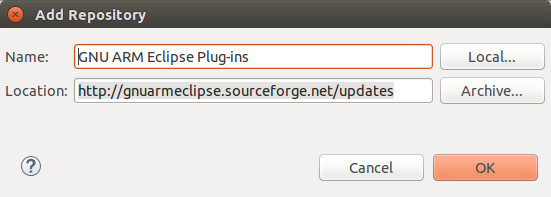 When the list loads, Tick the GNU ARM C/C++ Cross Development tools option and click Next.
 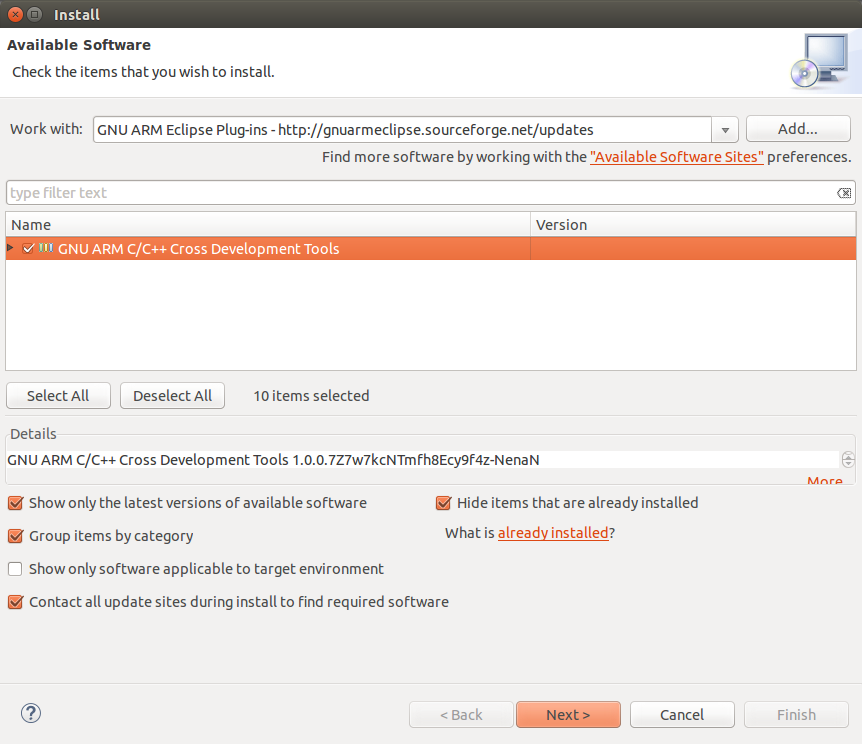 Then Click next. Accept the term and conditions and click on finish. This will install the tools that we need as well as ask you to restart eclipse. Don’t worry if it warns you that the source can’t be trusted.
Creating project template
- Using this link, download the CMSIS file, NUCLEO and the STM32F0 pack files.
- Once downloaded, rename the file extension from .pack to .zip. This will make it easier for us to extra the .pack content into our desktop.
- Right click on the files and select “Extract here”
- Right click on the STM32CubeF0 file and select “Extract here”
Create Eclipse Template
- Start by first create a new project in Eclipse.
- Under C/C++, Select C Project
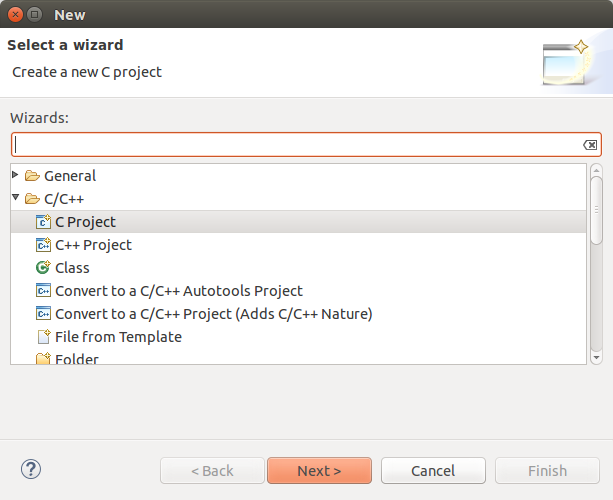
- Give the project a name (I’m going to call it CMSISTest).
- Under project Type, select empty project. Under Toolchains, Select Cross ARM GCC.
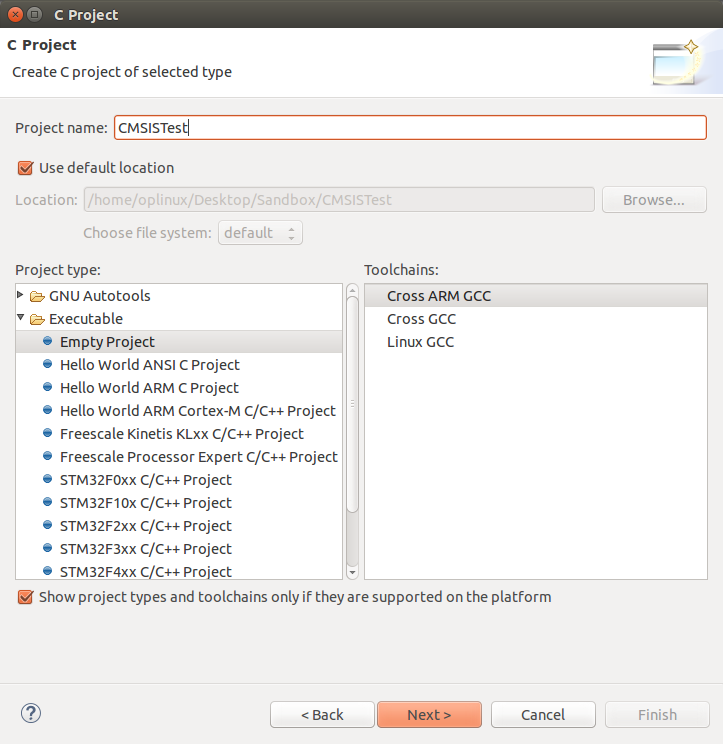
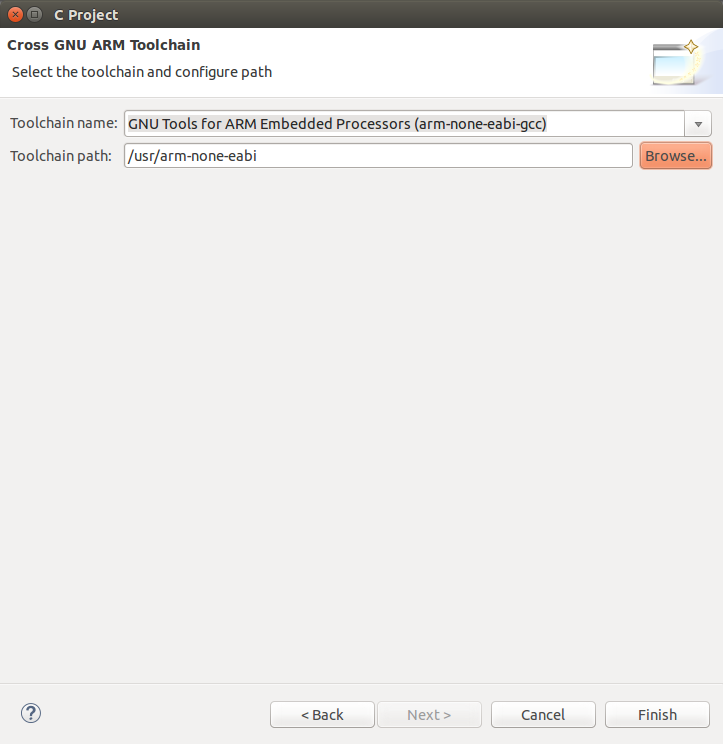
- In Toolchain Name: Select GNU Tools for ARM Embedded Processors (arm-none-eabi-gcc)
- In Toolchain path browse to the following folder location /usr/arm-none-eabi
- Click Finish. You now have a black template.
Now that we’ve created a clean eclipse template, lets go ahead and add the extra folders that we are going to need for organising our project.
This is one of those personal preference I was talking about. the compiler that side behind the scene doesn't care how you organised your files nor that it care what you named the folders.
The compiler simply gets told where and what to compile by eclipse and eclipse only knows that because of how we configure it.
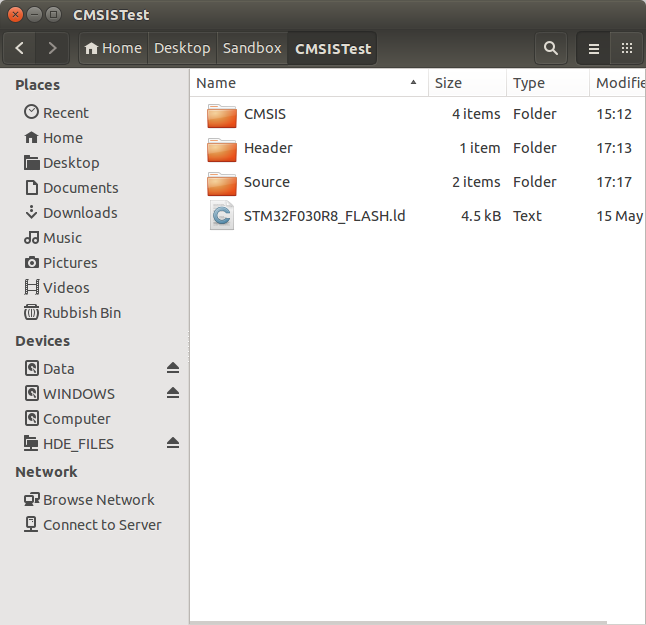
- If you go into directory of your project and create the Header, Source and CMSIS folder.
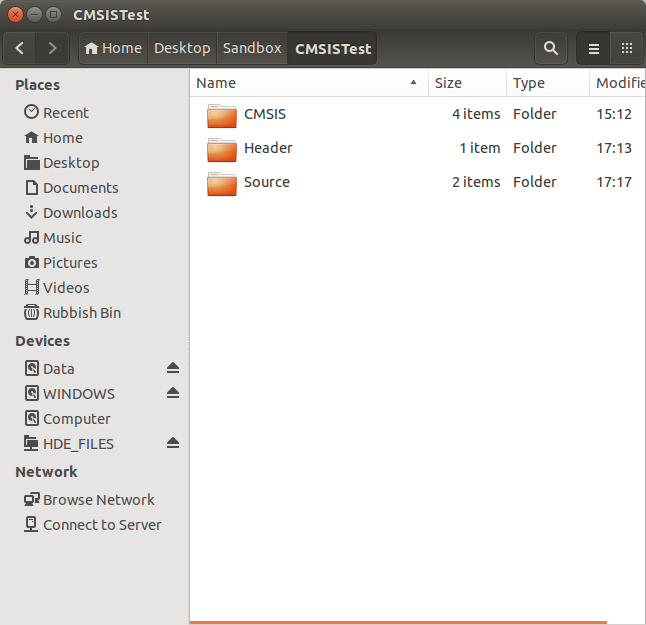
So this are my intention for the three folders:
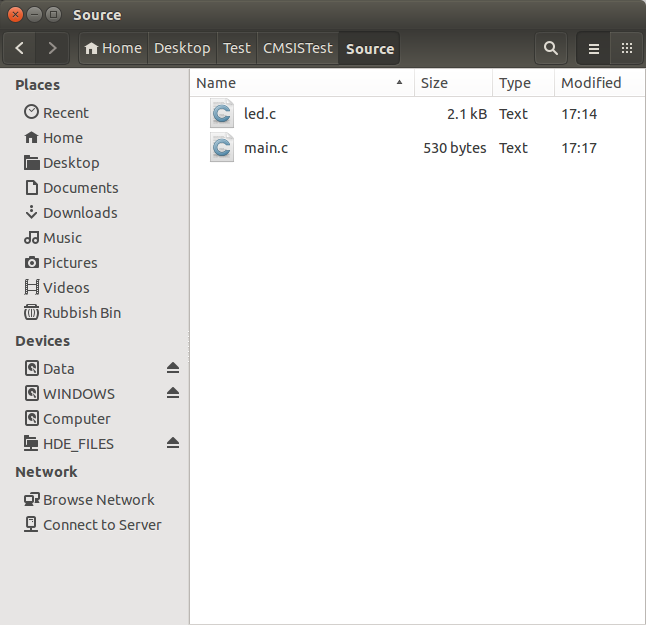
Source – this is where I would stick the project .c and .a files.
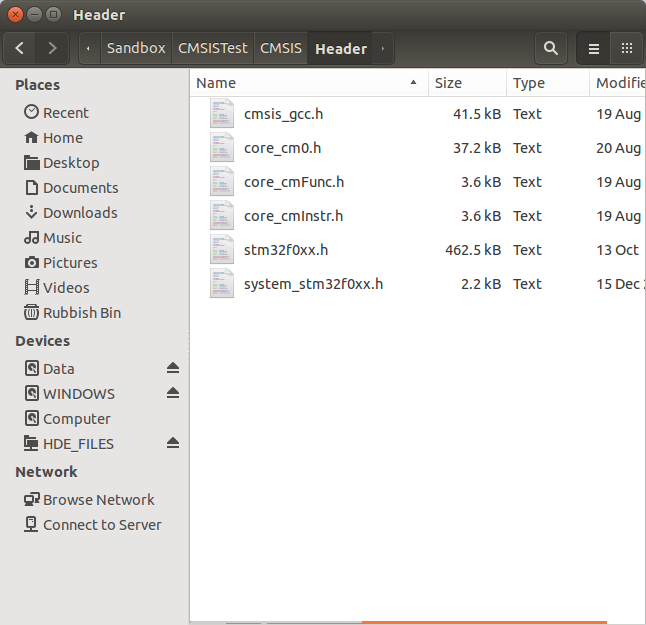
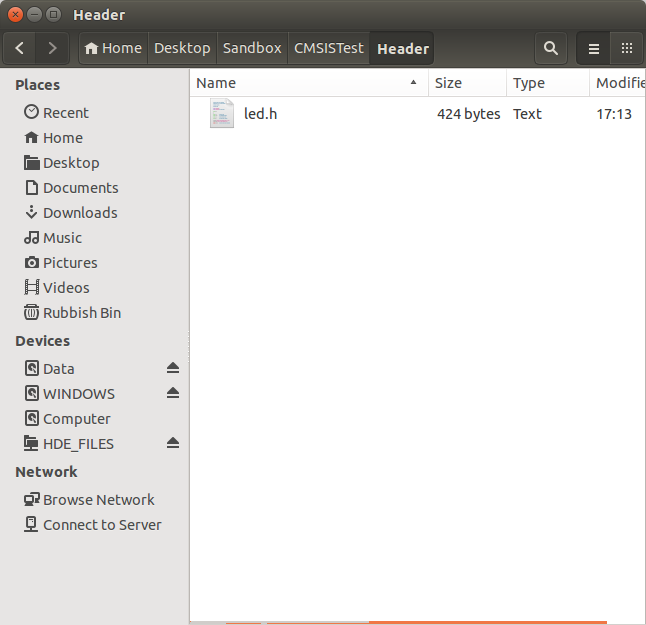
Header – This is where I would stick the project .h files
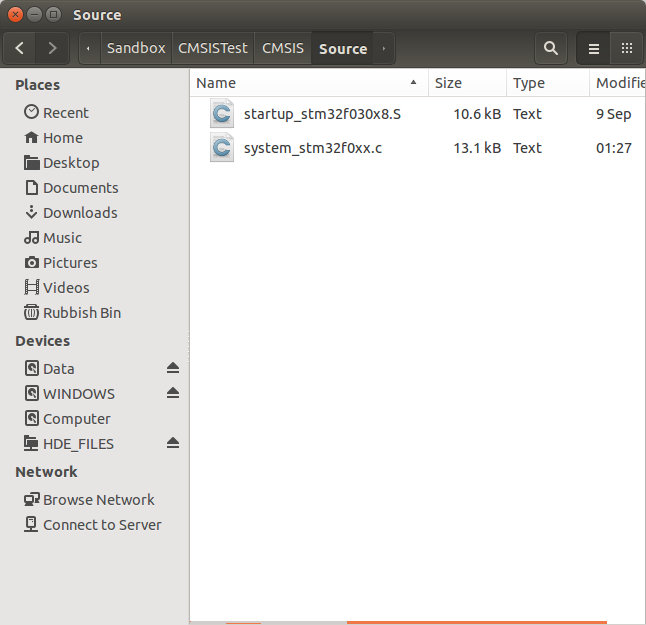
CMSIS/Source – This is where I would directly stick ARM CMSIS .c and.S files.
CMSIS/Source – This is where I would directly stick ARM CMSIS .h files.
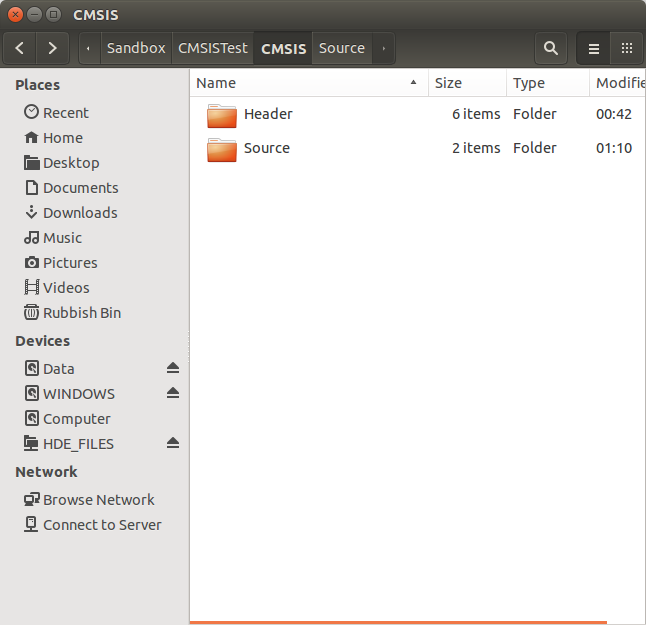
Now that the folder are ready, we are going to go ahead and copy over the CMSIS files that we need from the CMSIS-pack we download and extracted earlier. The microcontroller we are creating the template for is the STM32F030.
So copy the following files into the CMSIS folder we created:
Keil.STM32F0xx_DFP.1.4.0/Device/Source/ARM/system_stm32f0xx.c -> Sandbox/CMSISTest/CMSIS/Source/system_stm32f0xx.c Keil.STM32F0xx_DFP.1.4.0/Device/Source/ARM/startup_stm32f030.s -> Sandbox/CMSISTest/CMSIS/Source/startup_stm32f030.s Keil.STM32F0xx_DFP.1.4.0/Device/include/stm32f0xx.h > -> Sandbox/CMSISTest/CMSIS/Header/stm32f0xx.h
STM32Cube_FW_F0_V1.4.0/Projects/STM32F030R8-Nucleo/Templates/Src/system_stm32f0xx.h -> Sandbox/CMSISTest/CMSIS/Header/system_stm32f0xx.h
STM32Cube_FW_F0_V1.4.0/Projects/STM32F030R8-Nucleo/Templates/TrueSTUDIO/STM32F030R8-Nucleo/startup_stm32f030x8.s -> Sandbox/CMSISTest/CMSIS/Source/startup_stm32f030.S
Make sure that you capitalise the .S
Now will need to copy core_cm0.h, cmsis_gcc.h, core_cmInstr.h and core_cmFunc.h from the CMSIS-pack folder that we extracted earlier.
ARM.CMSIS.4.4.0/CMSIS/Include/core_cm0.h -> Sandbox/CMSISTest/CMSIS/Source/core_cm0.h
ARM.CMSIS.4.4.0/CMSIS/Include/cmsis_gcc.h -> Sandbox/CMSISTest/CMSIS/Source/cmsis_gcc.h
ARM.CMSIS.4.4.0/CMSIS/Include/core_cmInstr.h -> Sandbox/CMSISTest/CMSIS/Source/core_cmInstr.h
ARM.CMSIS.4.4.0/CMSIS/Include/core_cmFunc.h -> Sandbox/CMSISTest/CMSIS/Source/core_cmFunc.h
Now lets copy the microcontroller linker. this linker is what provides all the information the compiler needs to know about where to place our compiled code in the micro flash memory. For example, it tell the compiler how big the flash is.
- Inside the folder you extracted for STM32CubeF0, copy the linker to the directory of your project.STM32Cube_FW_F0_V1.4.0/Projects/STM32F030R8-Nucleo/Templates/TrueSTUDIO/STM32F030R8-Nucleo/STM32F030R8_FLASH.ld -> Sandbox/CMSISTest/STM32F030R8_FLASH.ld
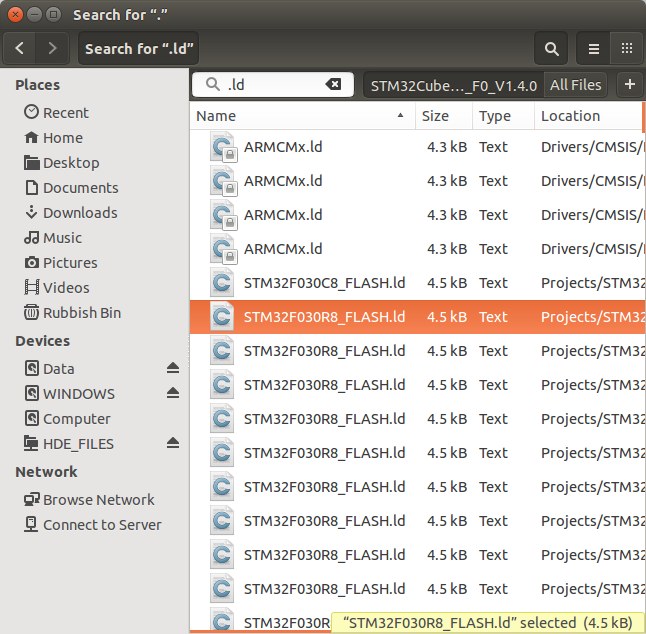
If you are wondering how I knew where the linker was located in the STM32cube folder, I simply search the folder with the following search term “.ld” and copied the first linker named “STM32F030R8_FLASH.ld“. Also it worth noting that even though STM have labelled the linker file as STM32F030R8, This linker is used on the STM32F030C8. Feel free to do a comparison of the two files.
The final thing we need to do before we start to configure eclipse is to create the a simple test program. For the purpose of this project, we are going to uses a pre-made test program that blinks the NUCLEO board LED. Now depending on which micro-controller you have, you will need to re-write the led.c functions to suite your MCU.
For now, you will need to download copy into your project the following three files:
main.c – It have the program main loop. copy to ./Source
led.c – this have the set-up and control code for the NUCLEO user led. Copy to ./Source
led.h – this has the C header files for the led functions defined in led.c. Copy to ./Header
Configuring Eclipse
- On the Project explorer, Right click on the project name and select Properties.
- On the Properties window, select Settings under C/C++ Build

- In Configuration, Select [All configuration]
- In the Tool Settings tab, click on Target Processor and change ARM family to cortext-m0. (Or select which even core you are using)

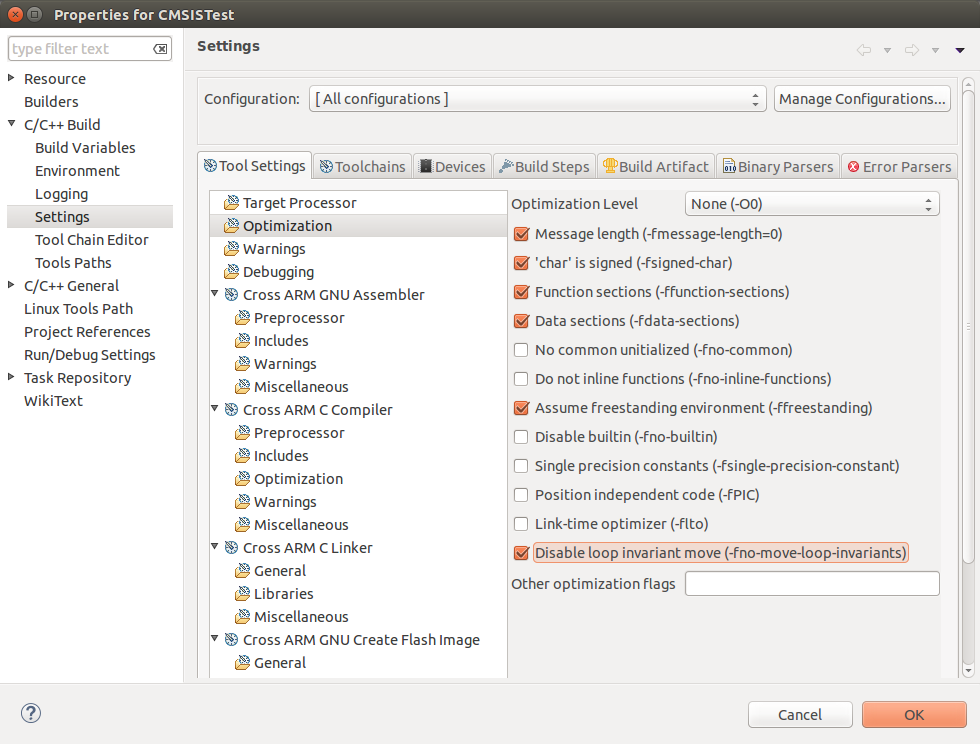
- Click on Optimization, then tick Assume freestanding environment (-ffreestanding). We need to enable this options because the CMSIS has a system start-up code that its not in located in main as the compiler would had assumed.
- In the same Optimization option, also tick Disable loop invariant move (-fno-move-loop-incariants)
- Click on the Warnings, then tick Enable all common warnings (-Wall) and Enable extra warnings (-Wextra).
Enabling this two compiler warnings is completely optional. However, if you are new to C programming then I would advice that you have them on while you’re starting out. To be honest, even if you are a grand master of C you are still better off having them on.

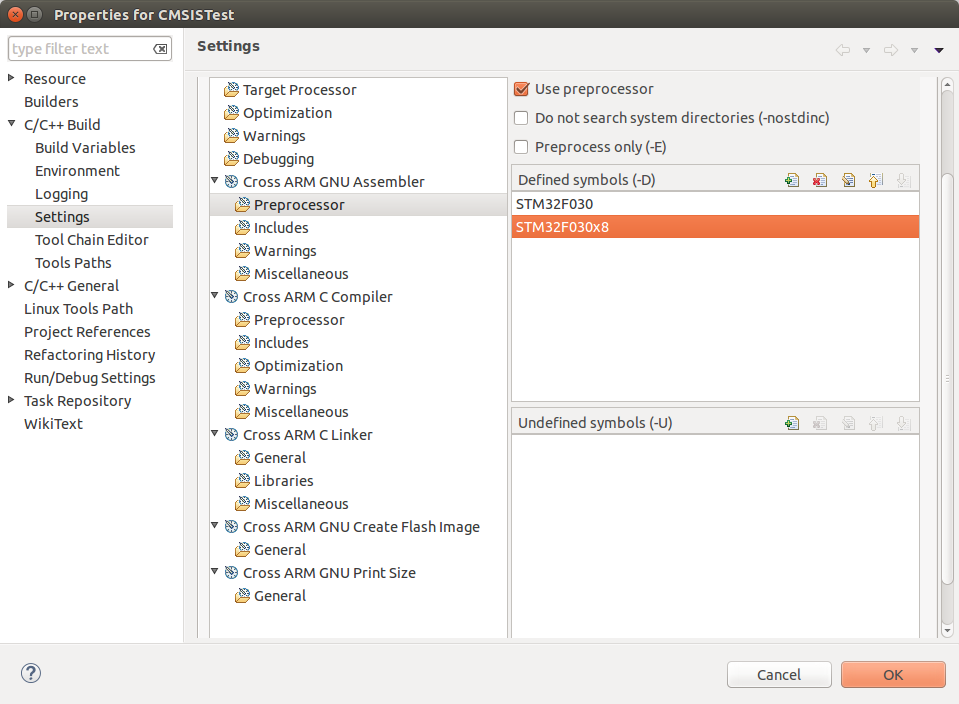
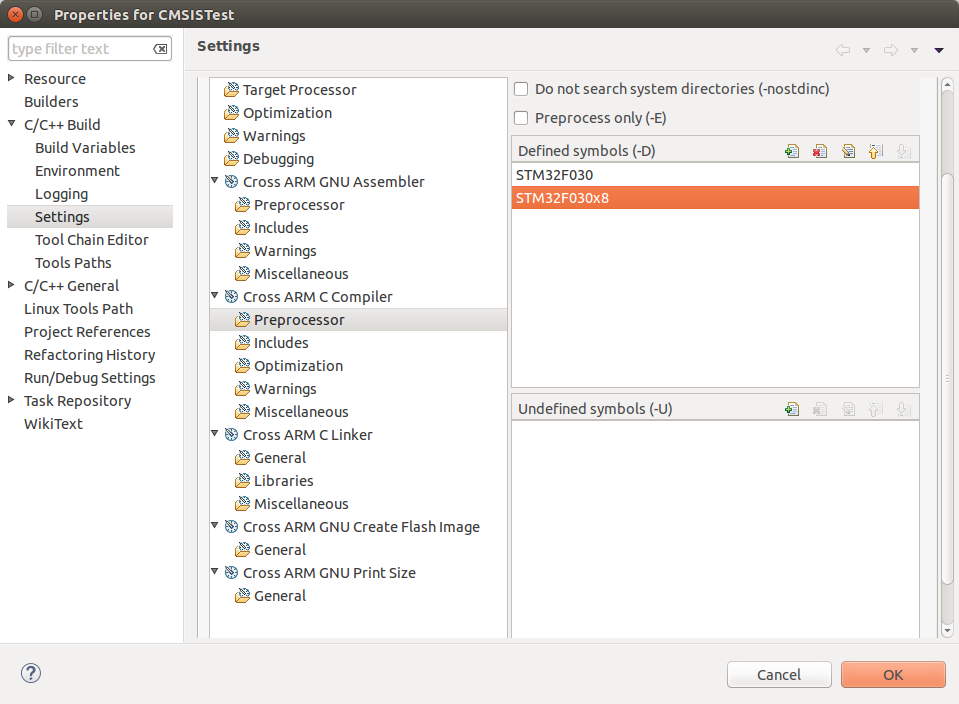
- Under Cross ARM GNU Assembler, click on Preprocessor
- Under Defined symbold (-D), Click on the green plus icon to add STM32F030 and STM32F030x8 definitions.
The STM32F030 tell the compiler to enable of C code used by our specific microcontroller.
For more definitions that you could add, see the CMSIS header files.
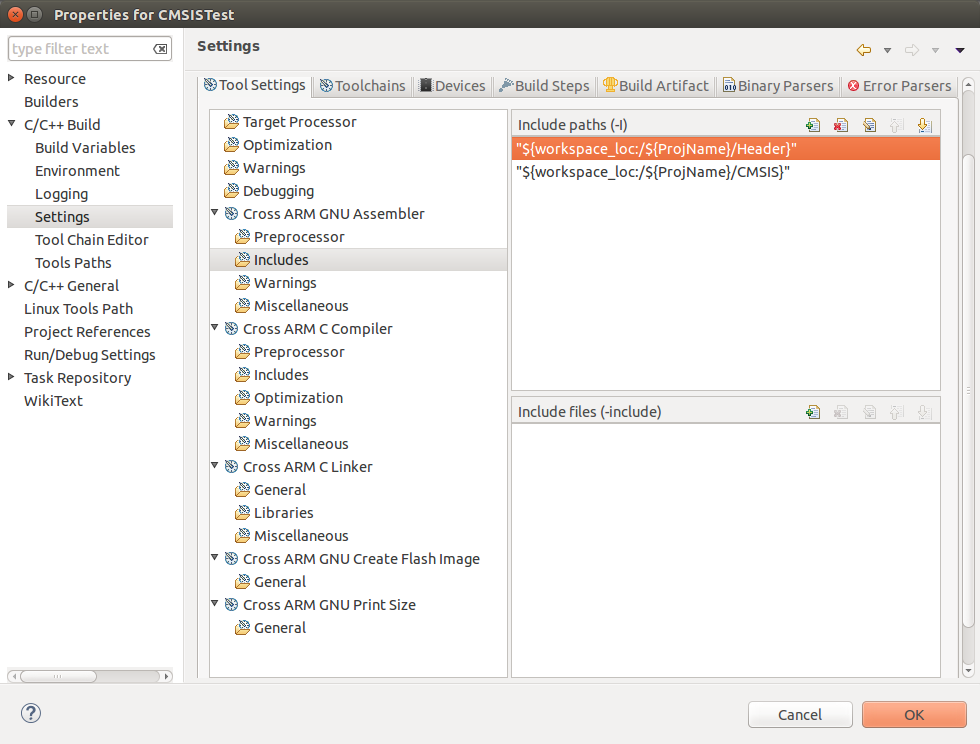
- Under Cross ARM GNU Assembler, click on Includes
- Under Include Paths (-i), Click on the green plus icon to add folder paths. You should be able to copy and paste.
Add “${workspace_loc:/${ProjName}/Header}” and “${workspace_loc:/${ProjName}/CMSIS}”
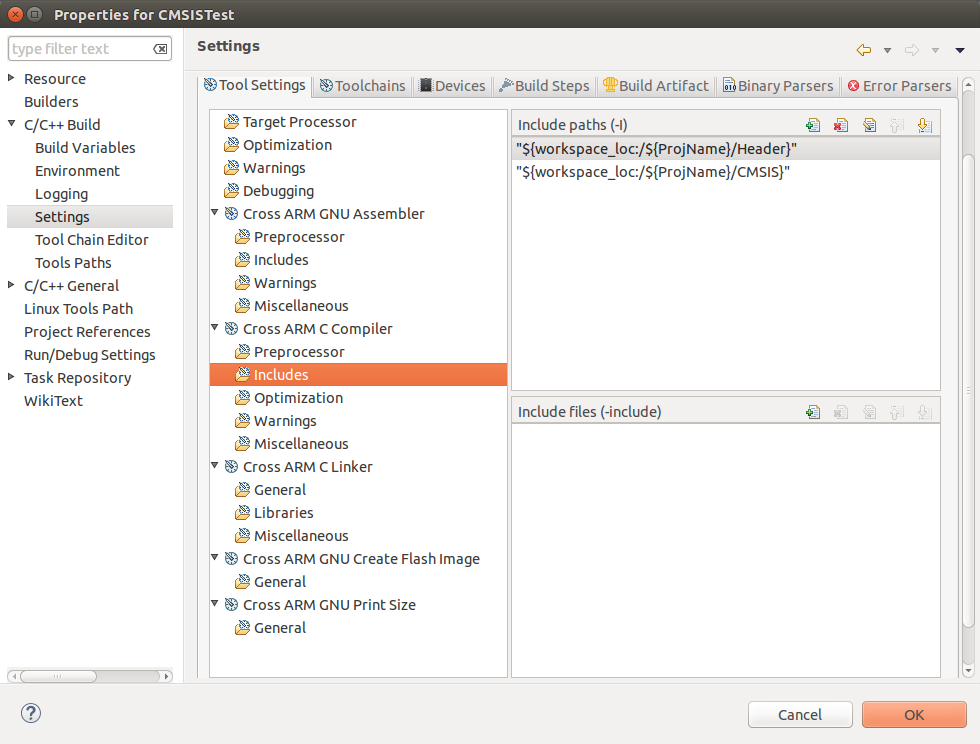
- repeater the last two steps for the Preprocessor and Includes option under Cross ARM C Compiler.
- Under Cross ARM C Linker, Click on General and then using the Green plus arrow add the following linker path “${workspace_loc:/${ProjName}/STM32F030R8_FLASH.ld}”.
- Tick on the Remove unused sections (-Xlinker –gc-sections). We are going to use the CMSIS start up code.

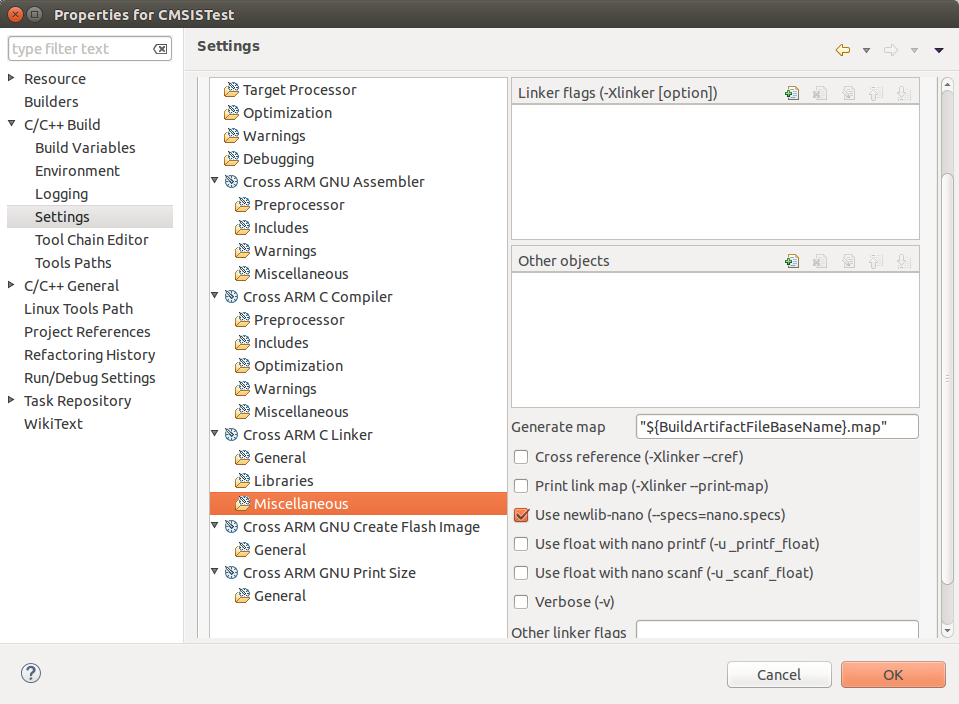
- While you are still in Cross ARM C Linker, click on Miscellaneous and then tick on Use newlib-nano (-specs=nano.specs).
Now the last thing we need to do is add the CMSIS and your project source folders.
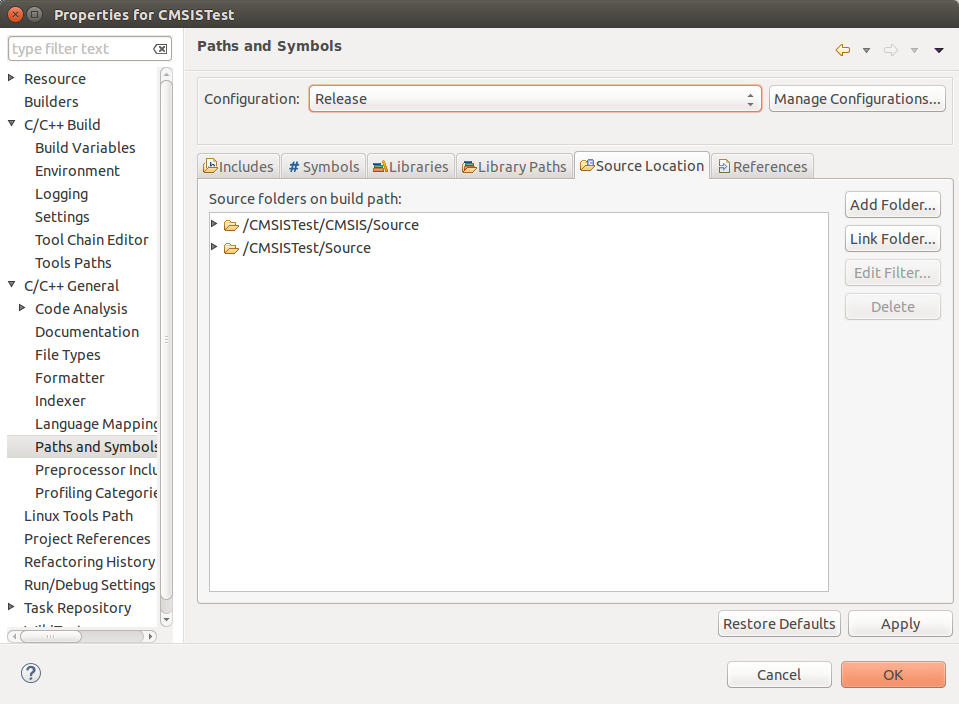
- Under C/C++ General, Click on Paths and Symbols.
- Now change Configuration: to Release. Your might say have [Active ] next to it. This only mean that Eclipse has been set to release mode.
- Now click on the Source Location tab.
- Click on the Add Folder
- Then select Select Source and CMSIS/Source. Then click OK
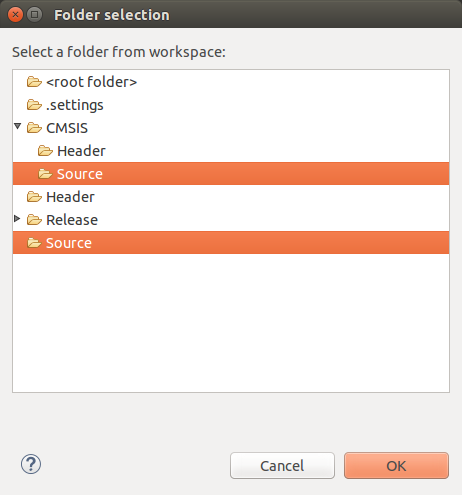
- Now select the folder that was already there and click on the Delete button. We don’t need the compiler to look at that folder for source files.
You should now have something that looks like this.
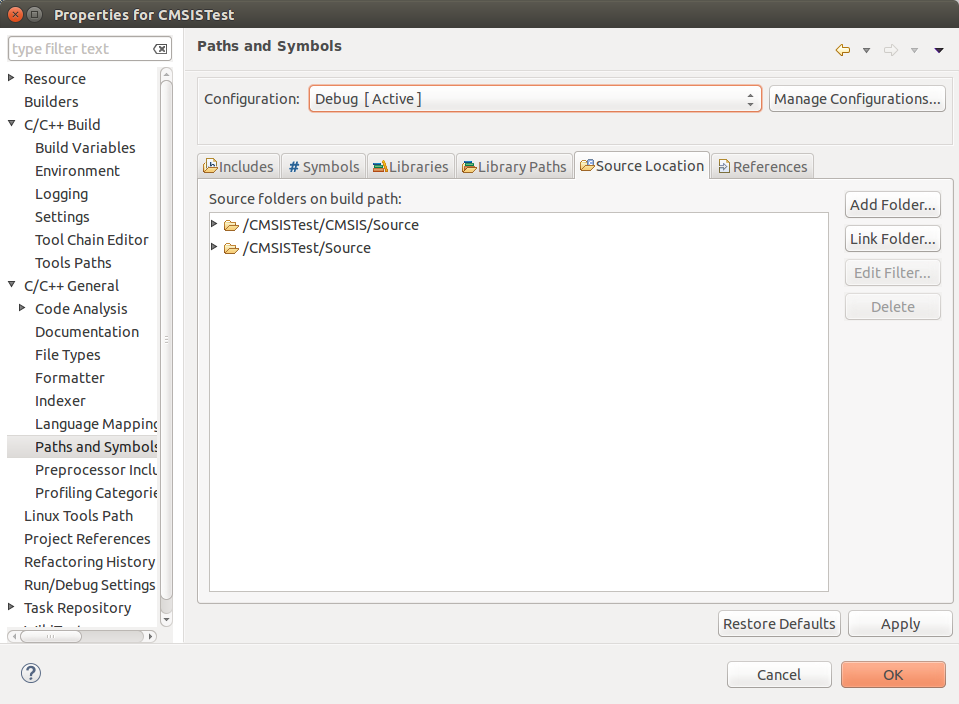
Now we are going to repeat the last five steps, but this time we are going to set the configuration to Debug.
- Change Configuration: to Debug. Your might say have [Active ] next to it. This only mean that Eclipse has been set to release mode.
- Click on the Source Location tab.
- Click on the Add Folder
- Then select Select Source and the click OK
- Now Select the folder that was already there and click on the Delete button
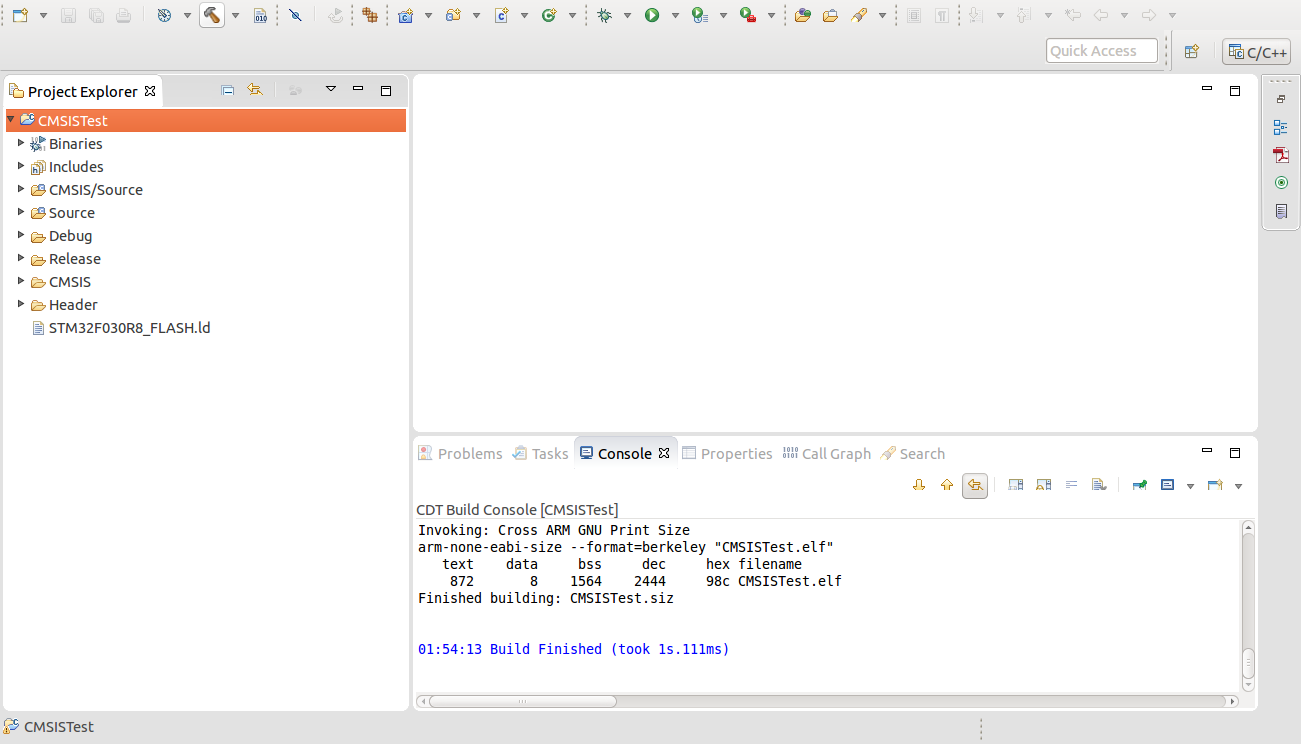
- Restart Eclipse and then Click on the Hammer Icon on the top left corner to compile the project for the first time. If everything has worked, then you should get finished build message on the console tab with no errors.
Configuring Eclipse Programmer/Debbuger
We are now going to configure OpenOCD in eclipse. Make sure that you’ve installed openOCD and had no error while compiling the project. We need the compile to create the project binary. .elf
- Click on RUN the eclipse Title menu.
- The click on Debug Configurations..
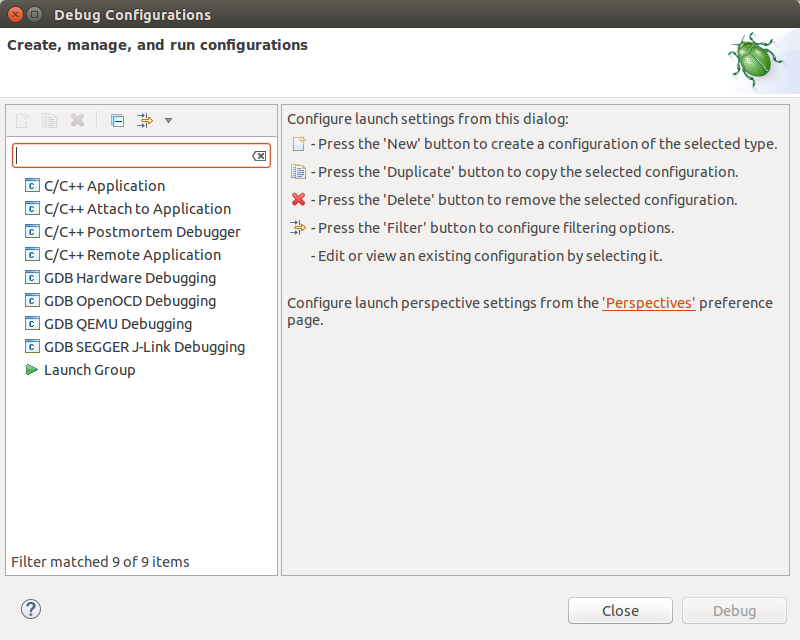
- Right click on GDB OpenOCD Debugging and click on New
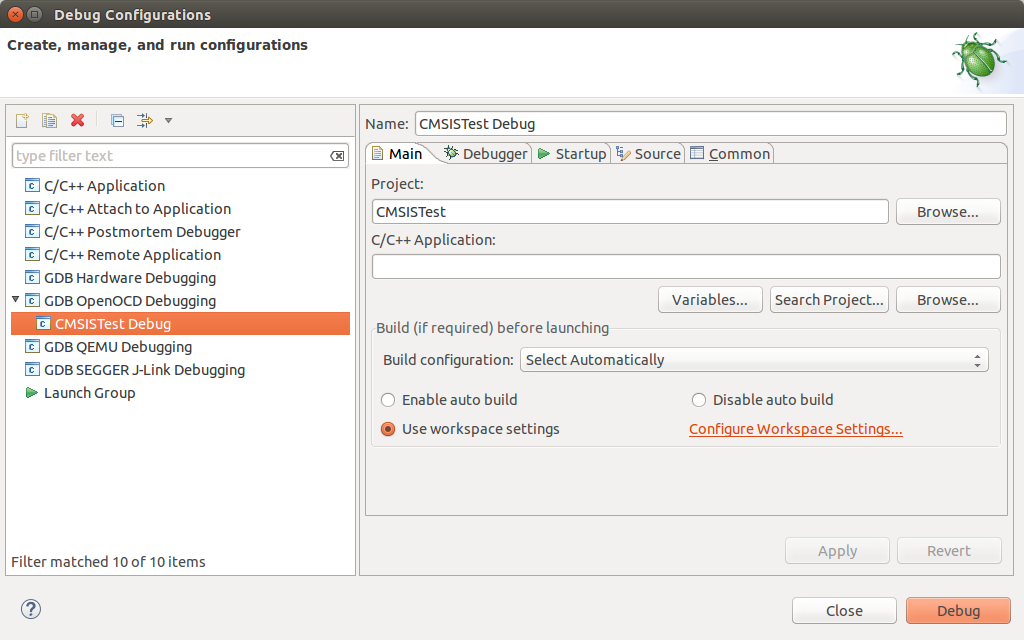
- Under Main tab, click on the Search project button
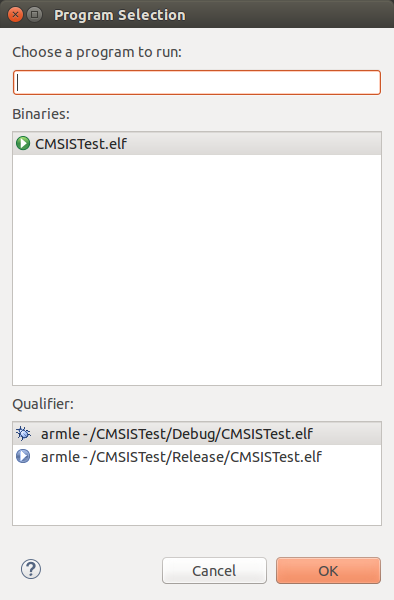
- On the new Window, Select project binary under Binaries: and click OK. It should end with .elf
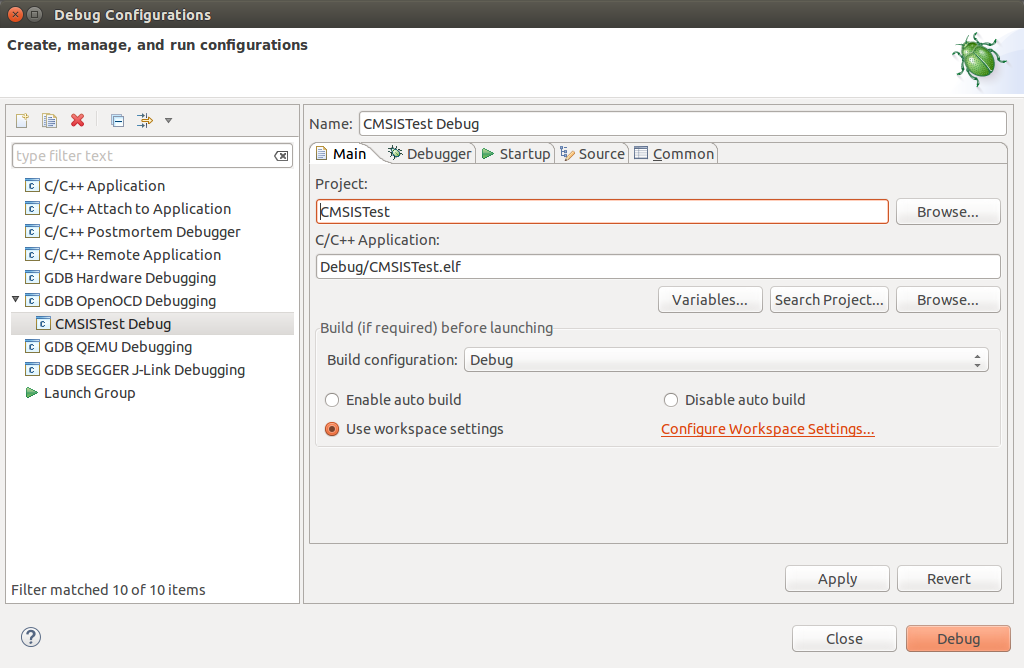
- Now Click on the Debugger tab
- Under the Config Options: type in -f /usr/local/share/openocd/scripts/board/st_nucleo_f0.cfg
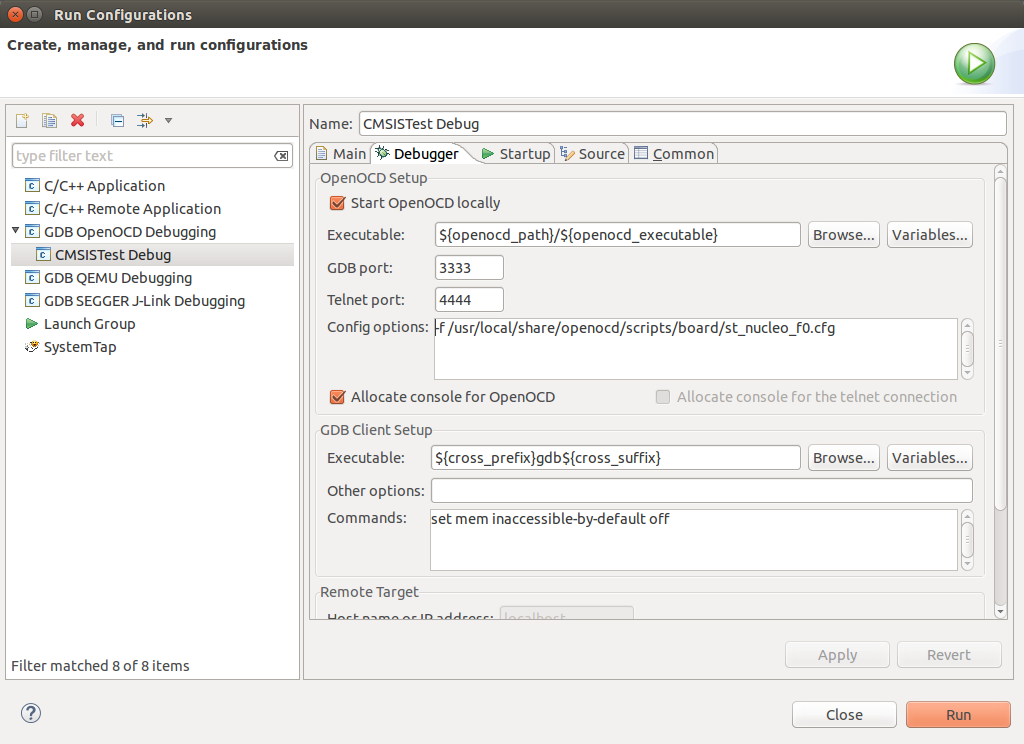
- Click on the Apply button and then the Debug button
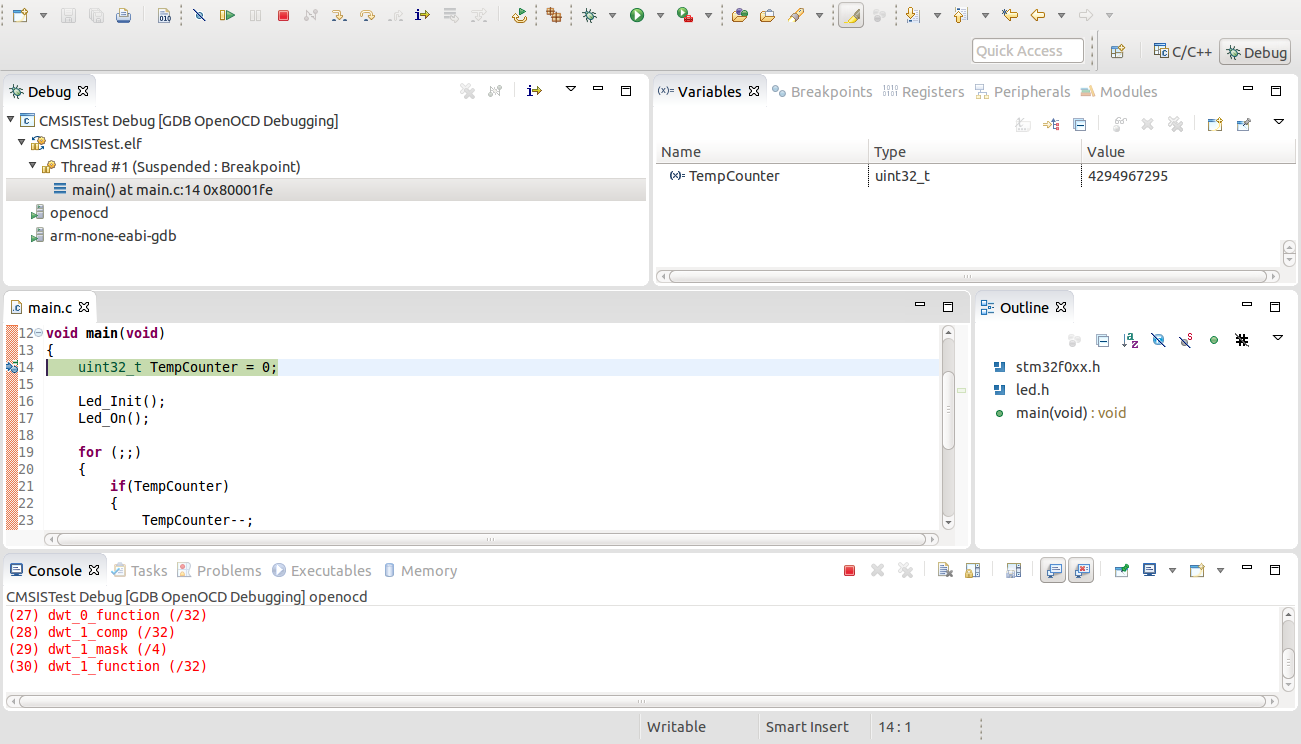
If everything has gone to plan then you should get a request by eclipse to change perceptive and it should start to debug.
Possible Issue
If you are having libusb() permission issues then the instructions in this link to fix it.
Leave a Reply